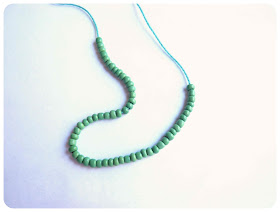
It's been such a busy time at the SLD Headquarters throughout December, with Birthday, mini-vacations, ALL the Christmas festivities... I ALMOST forgot to post my "Pattern of the Month!" (almost)
I devised this quick little pattern to make a beaded bracelet a few months ago and I have made many, many bracelets since, in all sorts of colour combinations :-) They're really fast and really easy to make! We've been wearing them at the beach, the kids have been wearing them around their ankles (cute!)
What you need:
-Approxiamtely 40-50 Size 6 (3.5mm) seed beads. These are large-ish seed beads and they're easier to thread onto the yarn, but there's no reason you couldn't use smaller seed beads if you can thread them onto your yarn :-) Also, glass beads are better, especially if you plan to get them wet (swimming, bathing etc)
-Small amount 4 ply or Fingering Weight cotton yarn
-2mm crochet hook
-bead threader or dental floss threader or waxed dental floss (for threading beads onto your yarn)
I didn't have a purpose built bead threader and I couldn't find any dental floss threaders, so I used waxed dental floss to thread the beads onto my yarn and it was very successful :-) Take a length of WAXED dental floss, approx. 25-30cm long. Bring the two ends together and gently squeeze it together with your fingers, the heat from you fingers will soften the wax and the ends will stick together (see the picture above)
Thread your yarn through the open loop in your dental floss, as shown in the picture above.
Thread the closed ends of the dental floss through your first bead, slide the bead down the dental floss, and on to the yarn, as shown in the picture above. Continue doing this with the rest of your beads.How ever many beads you think you're going to need, add a few more! Once you start making your bracelet you won't be able to add beads, so it's best to have a few extra beads, rather than accidentally running out :-)
Chain 25, *slide one bead up to your hook, as shown in the picture above, now slip stitch into the 2nd chain from the hook. Now continue to do one slip stitch each of the next 23 chain (for a total of 24 slip stitches)*. Chain 70, loosely & evenly, but not so loose that they are sloppy :-) (You can adjust the size of your bracelet here. You need to have 25 chain either end of your bracelet to tie it up, but the middle section can be varied to any length with more or less chain stitches. When you're doing the chains, measure it against your wrist/ankle etc, then do the remaining 25 chain for the tie). Repeat from * to *.
Now you will be crocheting your beads into the centre bead section. Insert hook into next chain, slide bead up to your hook, wrap yarn round hook (as shown in picture above), draw yarn through, wrap yarn round hook, draw through both loops. Continue adding beads in this way until you reach the first slip stitch section. Fasten off. Carefully weave in yarn ends. Enjoy your new Joya del Mar (Jewel of the Sea) Bracelet!


Will be beads be on the back of the work?
ReplyDeleteWill the beads be on the back of your work?
ReplyDelete